Leveraging Portals in ERPNext
The portal feature is a very powerful tool for the business owners using which they can build a user portal for non-system users of the ERP.
The Portal facility is very less talked about and I feel it is a very powerful tool for the business owners with the kind of facility we can give to them. You can build a user portal for non-system users of the ERP. Non-System users are the users which do not have access to ERPNext Console (Desk) but yet can access information (most probably Read-Only or in some cases in a way of web forms) by logging in to the server.
Portal is different from Desk in a way that it is a publicly visible website and you can also have users require login to access some pages or info. The login which is required can be a non-system user and in case if it is a system user, the user may have access to both Desk UI and Portal Pages.
What are the Use Cases for Portal?
Recently I landed upon couple customers which demanded a portal access. Which brought me to the idea of how powerful the portal mechanism is. And how still a lot more can be done by the ERPNext Developers (probably if someone can join me to contribute) for enhancing the Portal Pages facilities in Frappe Core.
Couple of Use Cases which I can jot down are:
- Targeted Quotation which can be accessed by Customer
- List of Word Order a Supplier (Services Provider) has to Complete
- Material Consumption by Third Party Supplier (But this cannot be done by portal, a Desk Access is required. It would be great if this is solved by the Portal in future)
- Student Profile
- Student Fees List
- Student Elective Selection in Program Enrolment (Again Desk is required)
- Student Assessment Result History
...
And the list will go on (probably couple of items must have already popped up in your mind based on interaction with your ERPNext clients recently)
In this article I will go through certain examples for creating pages and fetching certain information for the non-system users.
*Note: *I am not going through ERPNext Installation process, and I am assuming you already have an instance of ERPNext instance ready in your local or personal cloud. If you are new to this and want to understand how to install Frappe / ERPNext(https://github.com/frappe/bench) and start developing using Frappe Framework(https://frappe.io/docs)
How to Get Started with Portal Pages ?
You need to create your a frappe app for the same. This goes naturally as you don't want to customise ERPNext / Frappe code just for the pages which you are adding to the site.
Just in a usual way, if you have not created an app, create one. (you can skip app creation steps below if you already have an app )
Create a new Frappe App
In your bench folder
$ bench new-app MyCustomApp
It will ask you for info, fill in the version and description of the app. You will have a folder structure created for your app.
2. Install App into your Site
Since you have your ERPNext instance running, it means it must be running on some site.
If you are not aware of the site name, you can fetch it by typing this command from your bench folder:
$ cat sites/current-site.txt
Once you get the name of the site hit the command:
$ bench --site mysite.local install-app MyCustomApp
This will install the app in your site and migrate all the doctypes (if existed before hand)
Locate the www Folder
In your app folder locate the www folder. This is where you will put files and folders for your Portal Pages.
Understanding Portal Pages Basics
Lets say you want to create a page student profile. And you want to get this page displayed each time when following link is opened :
http://your-server-ip:your-port/studentprofile
You will be creating two types of file for creating the page for this URL:
- A HTML file
The name of the HTML file will be same as the path. That is studentprofile.html . You can add your piece of code here:
Student Profile
Some Data about student profile to be loaded here
We will be using jinja templates in this HTML to substitute data at runtime. But we will need some server side controller to fetch the data. A for that you will create a .py file in the same folder (www) as the html file, with the same file name as the html file.
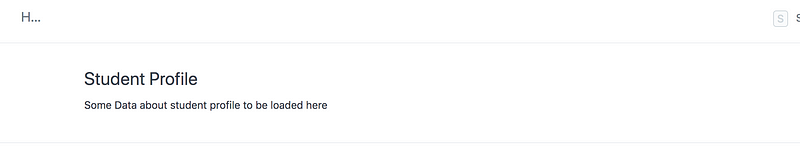
Screenshot of page When we open http://
2. A .py File
To load the information from the DB, you will have to call a Python function call to the Frappe API. The loaded data will be pushed to jinja templates in your html file via context object.
So in your www folder create a file named: studentprofile.py :
import frappe def get_context(context):
load some data and put it in context
context.message = "Hello Portal!"
Put a jinja template in the studentprofile.html code:
Student Profile
{{message}}
Refresh the browser and you will see the message now coming in from the .py file.

Screenshot of page When we open http://
Loading Data from the Document using Frappe
Let's see an example where we provide Student Login (with only website access and not System access):
- The student can Log in and can see only some information (let's say student profile, fees, and transcripts, etc ) from the Portal
- Our Web Pages will detect the username (email) of the website user (Student) and will fetch student information from the Student Document.
First we will need to load the student doc with the same email as the logged in user:
loggedinuser = frappe.session.user student = frappe.getall('Student', filters={ 'studentemailid': loggedinuser }, fields=['name', 'studentmobile_number'])
Then set the values in context:
context.name = student[0].name context.studentmobilenumber = student[0].studentmobilenumber
and then use it in Jinja Template:
Hello {{name}}
Let's see the entire code:
The Python code:
https://medium.com/media/14f07067a36ddeb0951808d5176aa922?postId=c116b279e86a
The jinja template:
https://medium.com/media/1de4c793e040f7fd7db7995c93ccdadb?postId=c116b279e86a
Make sure both the files are in www folder. If you run this, you will get a data like this:
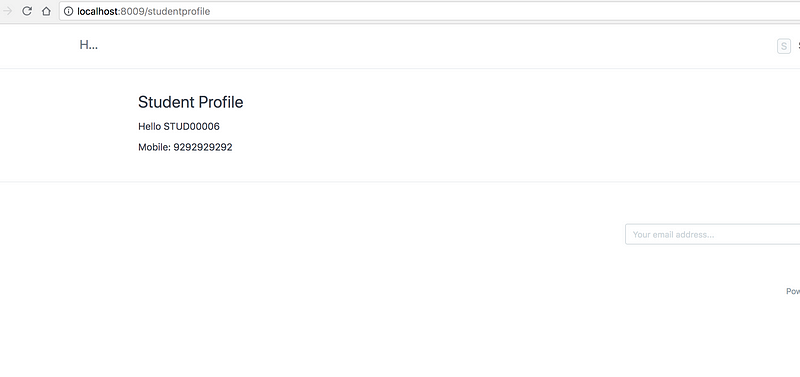
Student profile page, where required information about the loggedin user (student with website user type) is loaded using Frappe API Objects.
Diving Further: Loading from Documents
Let's write a code to load all the Fees for the corresponding student.
Let's write a utility to load the student doc from given the current session user:
https://medium.com/media/3e730bdc60456a653eb2c443f707ec09?postId=c116b279e86a
Fetching the Fees of the user:
Now let's integrate this small utility code with our controller of the webpage where we will use this load student doc matching email of the current user and then loading fees of the student.
https://medium.com/media/c440c4ddd3d00543317aec11b2cab306?postId=c116b279e86a
Putting up the jinja template to print all the fees in a table:
https://medium.com/media/603aa41a1d6631bc68119e45cadefb55?postId=c116b279e86a
*Note: *for the print view to work, you need to give read and print permission to Fees Document for Student Role. (See Roles and Permissions manager in ERPNext)
Lets see the output in browser:
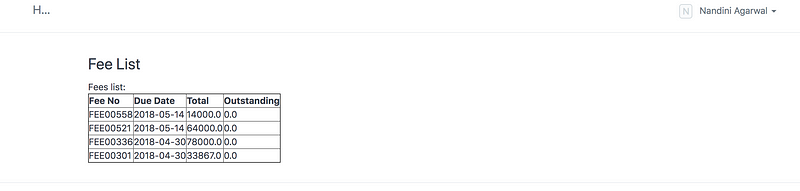
List of Fees of Student loaded by out Controller for the current logged in User with Website User Type and Student Role.
Using the Generator
Generators are useful to generate a WebView of a particular document. For creating a generator you need to:
1 Add Field ***route**:*
This field will mention the path for which the generator must show the webpage:

2 Mention in the ***hooks.py** Generator Document*
We need to mention in hooks.py that *Student *document will contain a generator and to do that simply mention add "Student" in the key website_generators :
... website_generators = ["Item Group", "Item", "BOM", "Sales Partner","Job Opening", "Student Admission", "Student"] ...
3 Make Doctype extend ***WebsiteGenerator** :*
In order to make our document be able to generate a WebView, we need to make it a website generator. And for that, we need to make it extend WebSiteGenerator instead of Document class :
... class Student(WebsiteGenerator): ...
4 Mention what is the template
In the student.py you will mention the following config for the website:
... website = frappe.dict(template = "templates/generators/studentinfo.html", pagetitle_field = "title") ...
5 And then finally you will mention the context:
You will fetch values of context which will be used in the jinja template:
def getcontext(self, context): context.nocache = 1 context.showsidebar = True context.title = self.title context.parents = [{'name': 'Student', 'title': _('Student'), 'route': 'student' }] context.admissionno = self.admission_no
So we are getting the title and the admission number of the student and setting the parents breadcrumb in the above code.
6 Setting the route value
There are several hacks to do it, I am setting the route value on validate of the student document:
class Student(WebsiteGenerator): ... def validate(self) : if not self.route: #pylint: disable=E0203 self.route = "studentinfo/" + "-" .join(self.title.split(" "))
7. Creating a Template
You will create a template in erpnext/templates/generators/ folder, with the file name called studentinfo.html and the generator will use this template to print the value.
{% block header %}
{{ title }}
{% endblock %} {% block page_content %}
{{admission_no}}
{% endblock %}
Putting it all together
The *Student.py *now looks like this:
https://medium.com/media/0ab9ce78c82909eca0514aa3dcbc83b9?postId=c116b279e86a
and studentinfo.html jinja template looks as follows:
https://medium.com/media/03a33419d635ef008654aef39246f869?postId=c116b279e86a
When you open the route:
http://localhost:8009/studentinfo/suresh
it would look something like this:
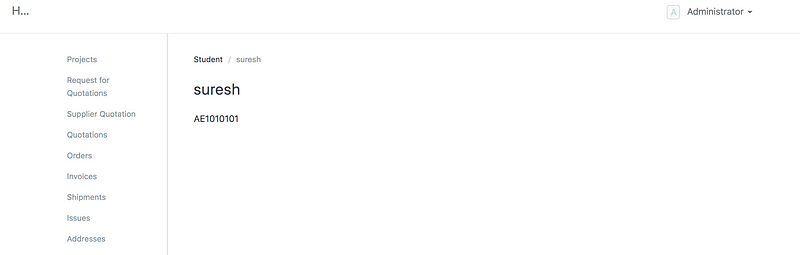
Student Info Page Generated By Document Generator
Concluding thoughts
There are certain use cases when you want to give information to "Guest" or website user:
- Which certainly requires a login
- Which has a role
- But does not have a access to the desk.
In such cases, you might want to provide a custom Portal, where you can have the user click on certain links/ tabs and have access to the information required.
Also if you want to have inputs from the Website User, you can go for WebForms.
In this article, we saw examples about how we can fetch information specific to the user by matching the email id of the session with the one linked with the target document how swiftly we can use frappe API to fetch information from the document and put it nicely in the UI with help of Jinja Templates. In future, we should see a lot of improvements and addition in the Portal Feature of the Frappe framework.
Parth Joshi
Parth is a Consultant, Corporate Trainer and Entrepreneur. His areas of interests are ERP, IoT and Blockchain.
No comments yet. Login to start a new discussion Start a new discussion